I’ve been running a Raspberry Pi 4 for the last couple of seasons as my imaging computer. That setup has worked pretty well. But the upgrades to KStars/Ekos have outstripped the updates to RaspianOS (which has still 32 bit), meaning that I could no longer run the latest updates to my imaging software. I installed the 64 bit version of Ubuntu onto the Pi and was able to run a fully up-to-date system, but the more robust OS ran a bit slower on the now 3-year-old Raspberry Pi, even using a bare-bones install.
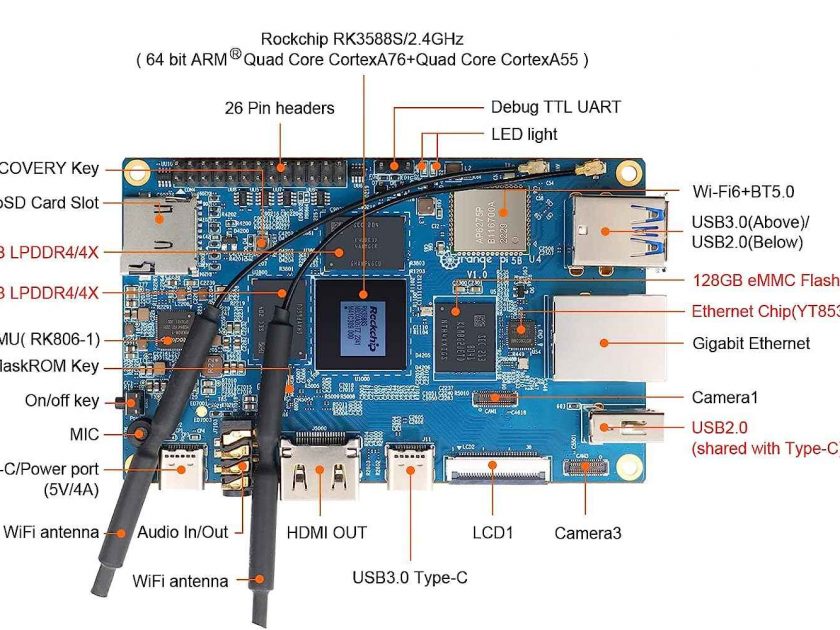
So, I picked up one of the Raspberry Pi alternatives: an Orange Pi 5B. Like the Raspberry Pi, the Orange Pi is a single-board micro PC. Unlike the Raspberry Pi–which is limited to 8gb of RAM–the Orange Pi can be configured for up to a whopping 32gb and has an 8-core CUP as opposed to the 4-core available on the Raspberry. And, where the Raspberry Pi runs off a MicroSD card, the Orange Pi supports eMMC storage… a much faster option.
There are several astrophotography-specific Ubuntu distributions for the Orange Pi, most notably AstroPiMaker4. I opted for a custom install, so I went with the software distribution available on the Orange Pi website, then installed all the software I need for imaging sessions. This obviously included a full INDI and KStars/Ekos install, but also included PHD2, Astrometry, and a VNC server (TigerVNC) for remote control. As with my Raspberry Pi, I configured the ethernet port to accept direct VNC connections from my laptop for when I am imaging off-grid.
The performance is–again, for a single board computer–stunning. The little box is way faster than it has any right to be and the difference in speed against the Raspberry Pi 4 is very, very noticeable. If you are looking for a compact, ASIAir/Stellarmate-like experience but want more control over your software, I highly recommend the Orange Pi.


