

The final hurdle at this point was finding an enclosure that satisfied a few criteria. It needed to be weatherproof first of all. While it’s pretty dry where I plan to install this thing, it does rain and snow… lots of snow. It needed to be large enough to fit everything. It needed to be ventilated, both for dew/temperature control and the minimal offgassing even a GEL battery can have. And, it needed to be mountable several feet off the ground to account for the 4-6 feet of snow that can accumulate.
Let me tell you, this is also a niche market. I found lots of great options… if I was a commercial operation looking to buy 100 electrical boxes at a time. I am not that, so off to Amazon I went. I quickly discovered that, like most things, good options aren’t cheap. There are lots of flimsy pieces of shit out there for cheap. I went with sturdy and (relatively) expensive.
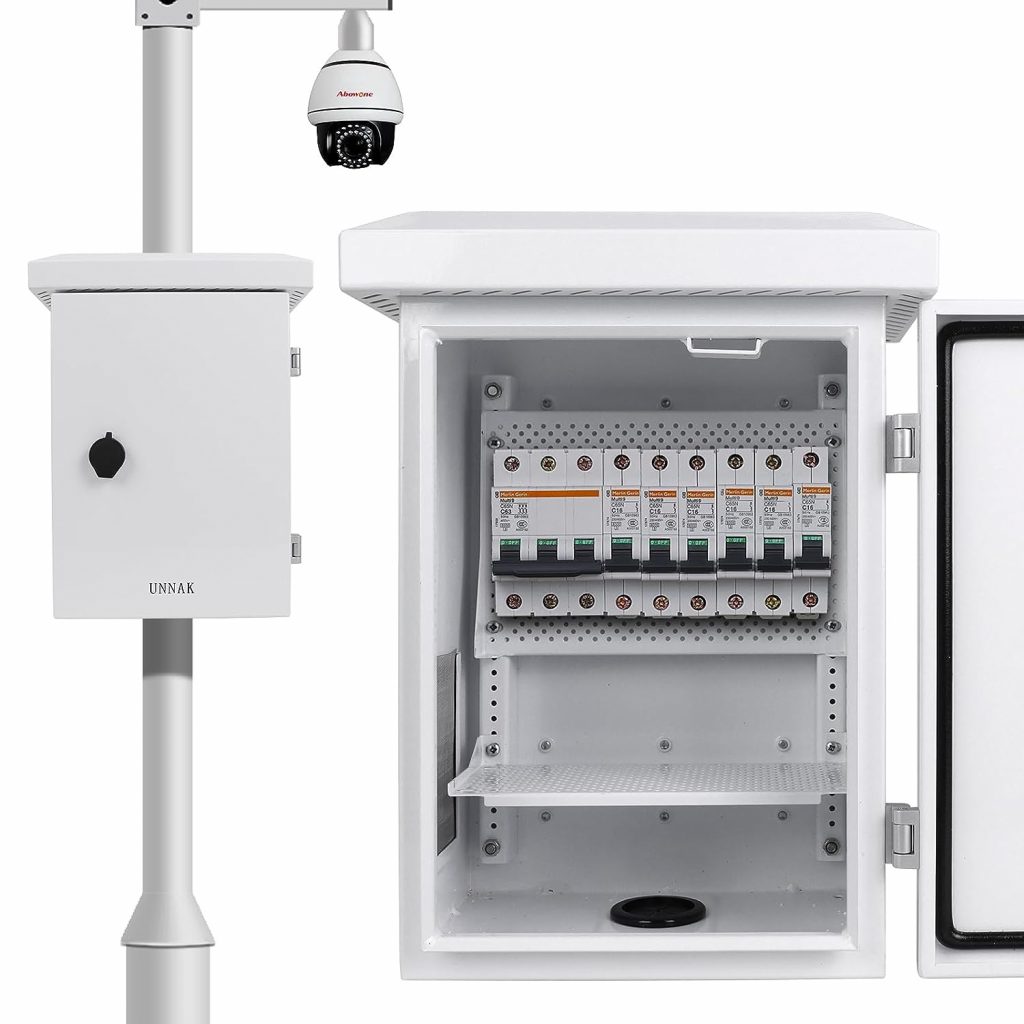
It had what I was after. Could be mounted to a pole, had good ventilation and weather protection, and had size options I could work with and fit everything in reasonably comfortably. After fretting about whether the reviews were real and I was actually about to take ownership of a flimsy piece of shit that also happened to cost a lot, I pulled the trigger and was pleasantly surprised when a heavy, sturdy, and quite well-finished electrical box showed up.
I had originally thought to have the camera external in either a small box or a PVC tube, but the removable lid on this box lent itself perfectly for mounting the camera right on the top of the box itself. This had a couple of advantages, including making sure the dome above the camera remained ventilated and clear of condensation. From using a sealed PVC pipe as a container for the all sky camera at my house, I’ve learned that sealed enclosures must have desiccant (at least in my wet environment) no matter how “dry” you try to make the air before you seal the thing up. Taking a snow mobile out there in the dead of winter to change out desiccant is not an appealing option.
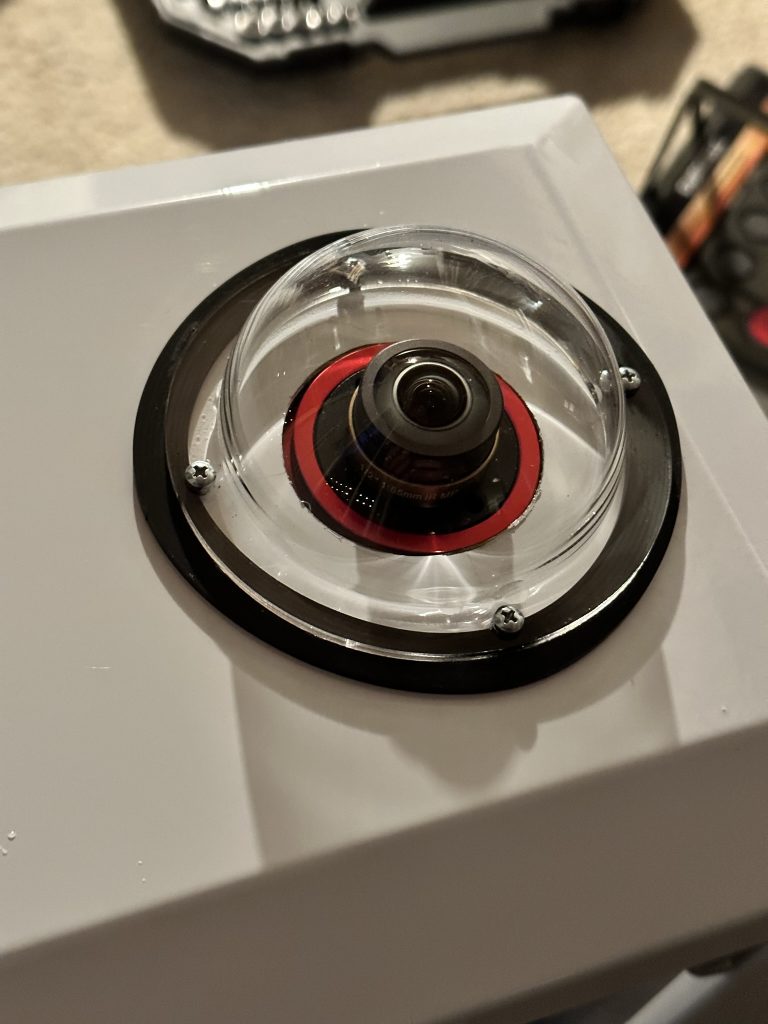
I cut a circular hole in the top of the box, just larger than the diameter of the camera. To seal up the acrylic dome, I decided to go a different route than my other all sky camera. Instead of screwing it down and trying to seal with silicon, I splurged for a $1 kitchen sink o-ring. It worked like a charm. I sprayed the hell out of this thing with a garden hose and it remained fully water-tight.
Now it was time to make it all fit.
In hindsight, I probably should have gone up a size. The Renogy charge controller is not small. And, theoretically, they recommend 6″ of clearance on each side. I’d already done some of the math and figured out that, with just single 100 watt panel and such a small battery, I was not going to be dissipating much heat with the Renogy 20 amp, so I did what any self-respecting, clueless hobbyist would have done: I crammed everything in there.
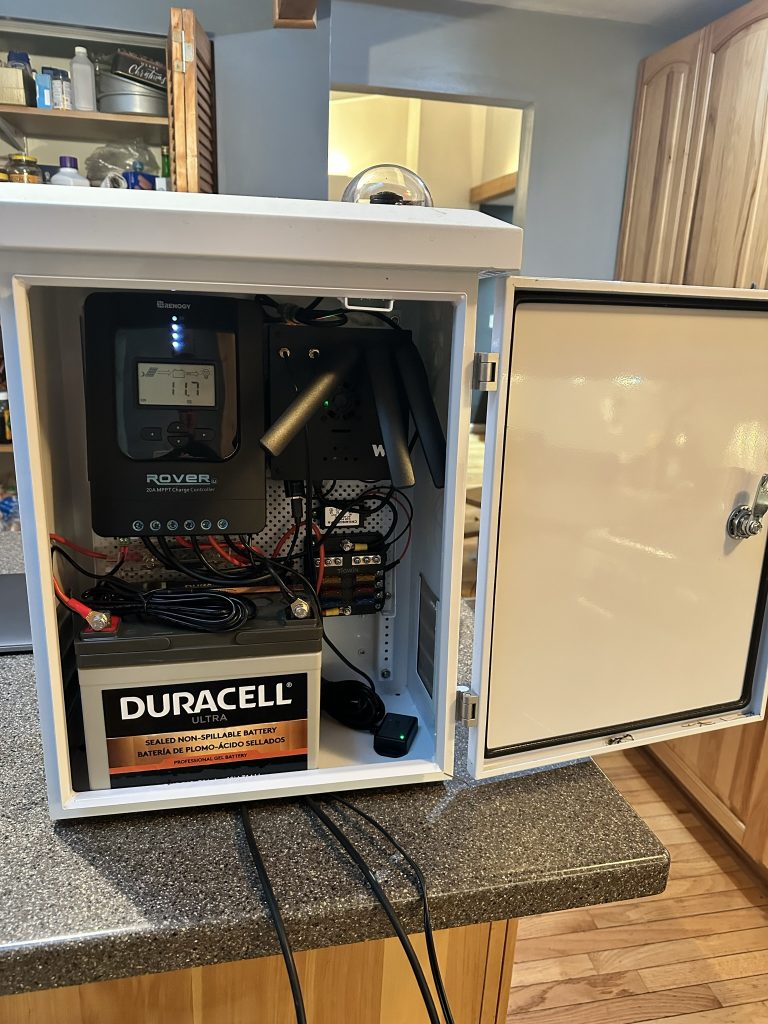
I excitedly connected the battery, hooked up the solar panel, closed the door, and took things outside to see if my new creation breathed life. Excitement gave way to disappointment when I quickly realized that I had, in fact, just built a very large and heavy Faraday cage. With the door shut, my cellular modem’s desperate bid to find a signal was useless.
Okay. I’ll admit. I should have seen this one coming. Luckily, there was an easy solution. I bought a cheap, weatherproof cellular antenna that could be mounted externally and wired to the modem. With that installed, my cell signal went back up to full and I was able to connect to the RPi with ease again.
The final hurdle was to find a way to monitor battery performance remotely. This piece definitely wasn’t a necessity… either the thing was going to be on or it wouldn’t. But I did want to keep an eye on performance and know whether I’d sized the panel and battery well enough to survive year-round out there. Thankfully, Renogy has a bluetooth module that you can use to monitor charging and load functions from their phone app. Some folks way smarter than myself put together some Python code that can read the output from the Renogy controller and spit it out in json format. It works perfectly.
I could just connect remotely via SSH and run the script manually to check battery status. But I’m lazy so I set up a cron job on the RPi that runs every 5 minutes, reads all the info from the Renogy controller it can, and forwards that info on to my web server where I can read the results and post them out on the website interface for the camera.
After doing some initial home testing (i.e., plugging it in and leaving it on for a few weeks in my backyard), it was time for the install. I had already been planning to spend a week out at the property working remotely and doing some biking, so I packed everything up and headed east. My first thought was to install on a metal pole cemented into the ground, but I was worried about rotation problems in the wind, and I wanted to be able to move the thing around fairly easily if needed. So, I opted for a treated 4×4 post.

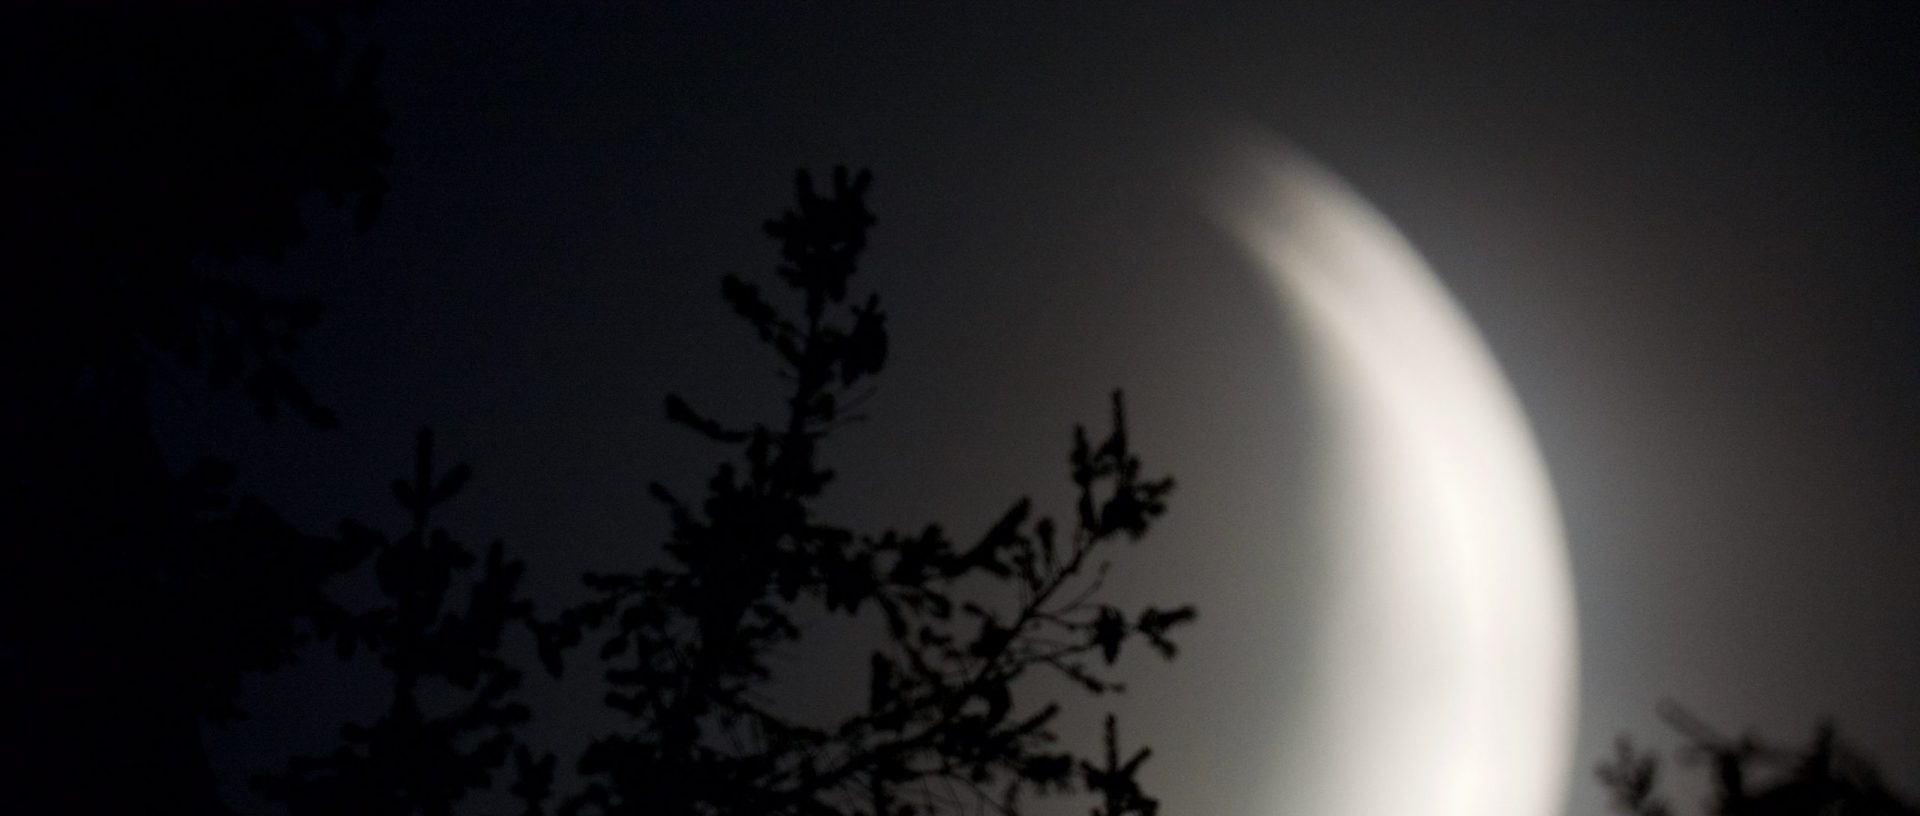
And… Frankenstein lives! So far, it has exceeded expectations. Connectivity is better than expected with data transfer rates obviously not what you’d get from a real internet connection, but absolutely fine for this application. The panel charges the battery well, even on the couple of mostly cloudy days we’ve had up there since the install. On sunny days, the thing is fully charged by 10am. And, best of all, the views are pretty amazing. I get a tiny bit of horizon glow from Chelan to the northeast and a tiny bit from Wenatchee to the southeast. But Bortle 2 looks pretty good:
In fact, my only complaint is that we seem to be in the direct flight path for both SeaTac and the Vancouver, B.C. airports. So, I now get to daily see the evening airplane rush hour. But that’s a serious first-world problem if I’ve ever heard one.
From here, we’ll see how the winter goes. Snow is an issue I still have to deal with, and it’s coming in just a couple of months. I ended up purchasing a 12v dew heater that should provide enough heat to keep the dome and top of the box clear, which is my next project. I’ll need to rig a relay up so it can be turned on and off. Maybe that adventure will be the final installment here.
Hey this is great. I just built my 1st all sky camera. I am in Tacoma, WA. I just ran it for the first time last night. Feel free to ping me as I may have a few questions about your settings. Thanks
For anyone out there trying to build a similar project, this might be useful: http://www.kickstarter.com/…/pv-pi-power-your-raspberry-pi-with-the-sun
Simplifies all of the power needs into a board compatible with the Raspberry Pi.
Interesting project, Matthew. I think the link is incorrect, but I was able to bring your kickstarter page up. I’m going to attempt to leave my camera up for the first time this winter. Will try to document the updates to the system to try to accommodate that here. Power will definitely be the challenge… site inaccessible except for snowmobile and/or skis, very little daylight this far north, etc.