


The second problem to be solved when working off-grid is power. Solar seemed like the obvious choice—if not the only choice. I suppose a wind turbine might have been an option, especially in the darker winter months. But I wanted to use solar as that’s how I hopefully plan to power a more permanent setup on the property.
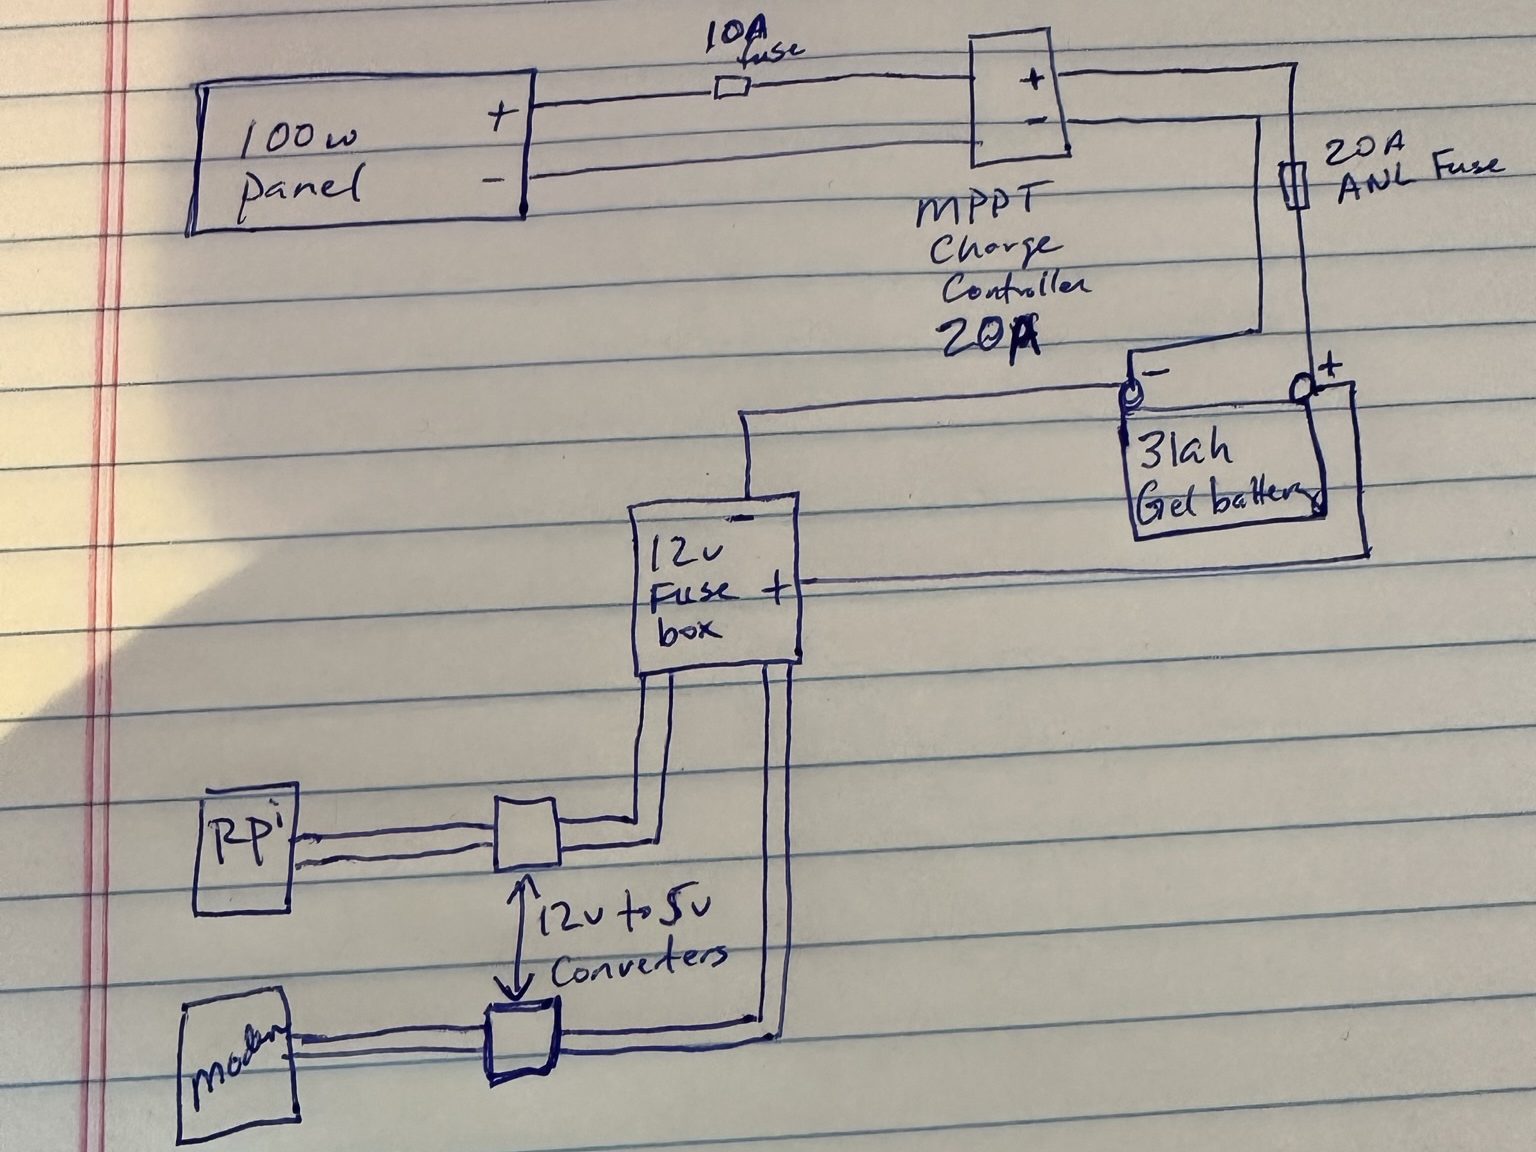
The basic setup needed a few basic components: a solar panel, a charge controller, and a battery. After that, some bells and whistles were also either desired or necessary, including a 12v fuse panel, a 12v to 5v step-down converter (so I don’t fry the RPi when I plug it in), and appropriate fuses to protect everything from surges.
Note that I had originally planned for two step-down converters, one for the Pi and one for the cellular hat. So far, powering the cellular off the Pi’s USB 3 port is working well.
I opted for a 100 watt panel and a 31ah GEL battery. I chose GEL as they tend to have better performance at extreme ends of the temperature range and can be discharged deeper than flooded or AGM batteries. GEL was also on obvious choice for minimum off-gassing—a key concern here given that I hoped to put the battery and all the other electronics in a single ventilated enclosure.
I went with the Renogy 20A MPPT charge controller. It was under $100 and has user-customizable charging profiles. It also has programmable low voltage disconnect and reconnect, i.e., I can tell the controller to shut down the load when the battery discharges below a specified level, then power things back up when the battery is fully charged. Again, automation is key when the plan is to have this permanently installed in a location that requires skis or a snowmobile to access in the winter. Wiring the step-down converter was fairly simple. I ordered a USB C cable with exposed wires on one end, then soldered the appropriate connections together with these handy things I picked up for another project a couple of years ago. After I did that, I found a step-down converter already wired for USB C. At least I got to use my heat gun.
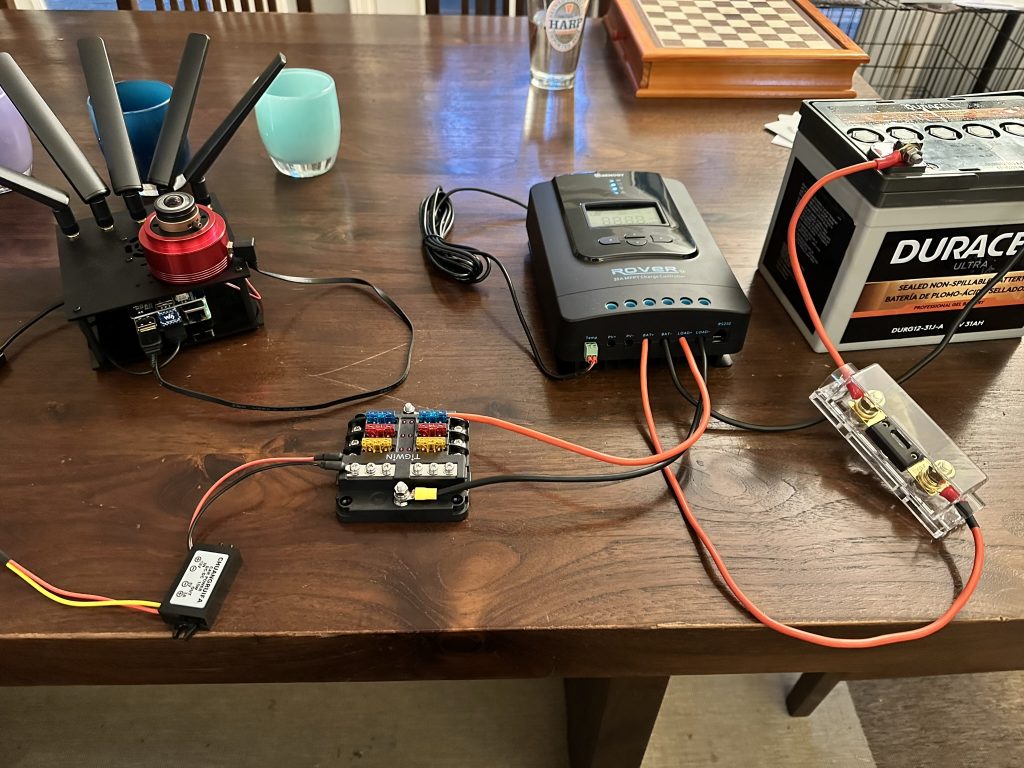
Once everything was wired up, I switched on the RPi and everything worked beautifully. I ran the setup in my living room for 3 days straight and only drew the battery down to 50%—a promising start. Now it was time to put the whole package together in a way that will survive the elements.
That story next time…